A complete, no-nonsense podcast equipment guide for busy professionals who refuse to let analysis paralysis kill their launch.
“In 2020, I had an expensive mic that ruined a big interview,” recalls Kevin Finn, co-founder of Buzzsprout and host of Buzzcast with 500-plus published episodes. His premium Shure MV7 failed mid-interview when the cable slipped out and reset all settings. Meanwhile, his overcomplicated setup with a Cloudlifter constantly produced “hums, buzzes, and background noise”.
Kevin’s experience isn’t unique. It reflects a broader pattern affecting countless aspiring podcasters. In fact, high-end, complex gear often creates more problems than simple, reliable podcast equipment—exactly the opposite of what most people believe.
Most first-time podcasters reach the same crossroads Kevin faced, but without the experience to shrug it off. They scroll reviews, debate XLR vs. USB, and quietly fear that being too frugal on hardware will doom their show before it starts. Meanwhile, the real hazard isn’t under-spending; it’s never hitting record.
This guide eliminates the guesswork. You’ll leave with:
- A complete pro-quality shopping list that tops out at $200.
- Clear reasoning behind every item for informed decision-making.
- The conviction to order today and start recording this week, not next month.
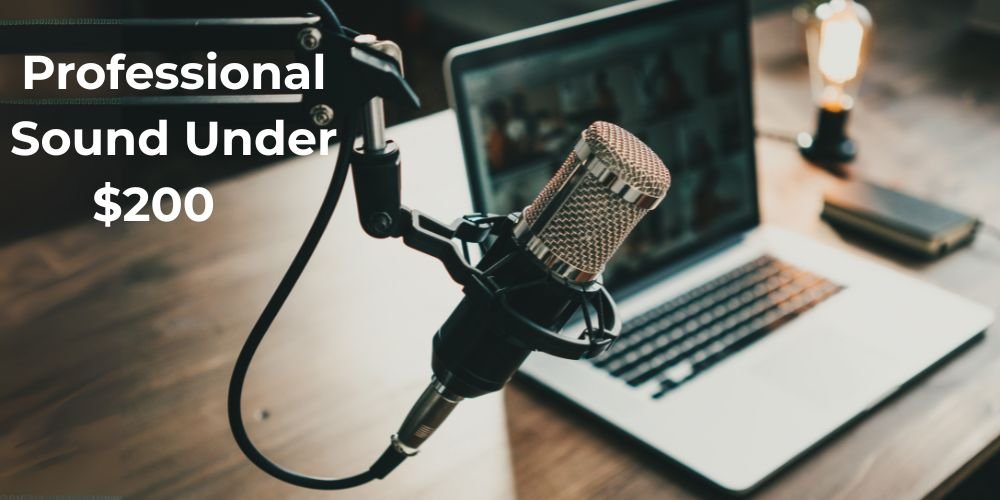
Why $200 Is the Sweet Spot for Podcast Equipment
The podcasting landscape is experiencing consistent growth in recent years and it is expected to keep growing until 2030, which means that in spite of the competition there is still a lot of opportunity for new podcasters.
Here’s the encouraging reality: audio quality matters far more than premium equipment. According to industry analysis, most podcasters don’t need to spend more than $150-$200 on equipment to achieve professional results. Going over $200 for your podcast equipment is where the return on investment may not be justified for beginners.
Consider Tim Ferriss’s approach when launching his now-legendary podcast. His original plan was refreshingly simple: commit to just six episodes. If he didn’t enjoy the process, he’d “throw in the towel and walk away.” He viewed it as “systems thinking”—even if the podcast failed, the experience would improve his interviewing skills for future book projects. That mindset shift from perfectionism to experimentation changed everything.
Professional podcasters understand a crucial truth: consistent content beats perfect equipment every time. The gear gets you started, but your unique perspective keeps listeners coming back.
The Complete $200 Podcast Equipment Shopping List
Building an effective podcast setup budget requires strategic thinking. Each component serves a specific purpose in your audio chain, and understanding these roles helps you make informed decisions rather than impulse purchases.
Core Equipment Breakdown: (Total Investment: $186-$200)
- Microphone: $70 (your primary investment)
- Audio monitoring headphones: $69
- Boom arm and shock mount: $37
- Cables and accessories: $10-$25
This best podcast equipment under $200 strategy gives you multiple pathways to professional sound. You might choose a higher-end microphone with basic headphones, or balance mid-range components across the board. Both approaches work—the key is starting somewhere instead of researching indefinitely.
Smart podcasters often begin with the USB microphone path for simplicity, then upgrade to XLR interfaces as their shows grow. This progression prevents the overwhelming complexity that stops many aspiring podcasters before they begin.
Your Primary Investment: Microphone ($70)
Your microphone choice determines 80% of your audio quality—everything else is enhancement. The Samson Q2U stands out as the clear winner in the affordable podcast microphone setup category. The Q2U’s dual connectivity means you can start recording today via USB, then upgrade to professional XLR interfaces later without replacing your microphone.
Why the Samson Q2U dominates budget setups: This dynamic microphone delivers broadcast-quality sound while offering upgrade flexibility that USB-only mics can’t match. When you’re ready to expand your setup with an audio interface, you simply switch from USB to XLR without replacing your primary investment.
Dynamic microphones like the Samson Q2U excel in untreated rooms because they reject background noise naturally. Unlike condenser mics that capture everything (including your neighbor’s lawn mower), dynamic mics focus on your voice while minimizing environmental distractions. This characteristic makes them ideal for busy professionals recording in home offices, bedrooms, or other non-studio spaces.

Alternative consideration: If you prefer plug-and-play simplicity, the Blue Yeti USB microphone offers multiple pickup patterns at $139.99. While slightly over our core budget, it provides built-in monitoring and zero learning curve for immediate recording.
The key insight most beginners miss: microphone positioning matters more than microphone price. Speaking directly into your chosen mic will produce better results than expensive equipment positioned incorrectly.
Monitoring: Headphones ($69)
Monitoring your audio while recording prevents costly mistakes that are expensive to fix in post-production. Closed-back headphones are essential for recording—they prevent audio bleeding back into your microphone while giving you accurate feedback on your voice quality.
The Audio-Technica ATH-M20x at $69 provides excellent entry-level monitoring with lightweight comfort for extended recording sessions. Their accurate frequency response helps you detect issues like background noise, mouth sounds, or inconsistent volume levels in real-time.

Professional upgrade consideration: The Sony MDR7506 at $99.99 offers industry-standard reference sound and exceptional durability. These headphones appear in professional studios worldwide, providing confidence that you’re hearing your recordings accurately.
Comfort trumps features for long-form content creators. If your podcast format includes lengthy interviews or extended solo episodes, prioritize headphones that remain comfortable after 60+ minutes of wear. The best headphones are the ones you’ll actually use consistently.
Positioning: Boom Arm & Shock Mount ($37)
Proper microphone positioning separates amateur recordings from professional-sounding content. A boom arm eliminates handling noise, provides consistent positioning, and frees your hands for natural gesturing while speaking.
Generic boom arms work adequately, for instance you can get the InnoGear Boom Arm at $26.99, which provides sturdy construction and full adjustability that accommodates different recording positions and desk configurations.

The positioning principle most podcasters get wrong: Your microphone should be close enough to capture your voice clearly but positioned to avoid breathing directly into it. A boom arm makes this optimal positioning effortless and repeatable.
Installation takes 15 minutes and requires only basic tools. The immediate improvement in audio consistency justifies this investment for anyone planning more than occasional recording sessions.
Connecting It All: Cables & Interface Options ($10-$25)
Strategic accessories amplify your core equipment’s performance without requiring additional major purchases. These additions address specific recording challenges while maintaining budget consciousness.
Pop filter addition ($10-$20): Reduces plosive sounds (P’s and B’s) that can overwhelm your audio. A simple fabric or foam windscreen provides similar benefits for dynamic microphones at lower cost. The Neewer Pop Filter Shield will do the trick at just $9.99.

Acoustic treatment basics: Heavy blankets, closet recording, or strategically placed pillows dramatically improve room acoustics without permanent modifications. The goal is reducing echo and background noise, not creating a professional studio.
Cable management solutions: Velcro ties and cable clips prevent connection issues and maintain a clean recording environment. Reliable connections prevent the frustration of mid-episode technical failures.
Recording software recommendations: Free options like Audacity or GarageBand provide all necessary editing capabilities for beginners. Paid alternatives like Riverside offer advanced features as your skills develop. For comprehensive guidance on podcasting software selection, check out our detailed podcast recording and editing tools guide that covers both free and premium options.
Room for Upgrading: USB Connection or Audio Interface
The beauty of starting with a USB microphone like the Samson Q2U lies in eliminating this expense initially. You can begin recording immediately without additional equipment, then add an audio interface later as your needs expand.
For immediate XLR benefits: The Focusrite Scarlett Solo 3rd Gen at $109.99 provides professional preamp quality and low-latency monitoring. This investment future-proofs your setup for additional microphones, musical instruments, or advanced recording techniques.
The upgrade path advantage: Starting USB and later adding an interface teaches you the fundamentals without overwhelming complexity. Many successful podcasters operate USB-only setups for years before feeling the need to expand. This approach prevents the paralysis that comes from trying to master every component simultaneously.
When evaluating interfaces, prioritize solid drivers and reliable connectivity over flashy features. The Scarlett Solo’s reputation stems from its rock-solid performance rather than extensive capabilities—exactly what busy professionals need.
Quick Podcast Equipment Setup Guide
Successful setup follows a logical sequence that prevents common connection and configuration mistakes. Taking time for proper initial setup saves hours of troubleshooting later.
Physical setup first: Install your boom arm and attach your microphone with shock mount. Position everything at comfortable speaking distance before making any connections. This prevents awkward cable routing and ensures comfortable recording posture.
Connection sequence: For USB microphones, connect directly to your computer and test basic recording before adding headphones. For XLR setups, connect microphone to interface, interface to computer, then add headphones for monitoring.
Software configuration basics: Select your microphone as the input device in your recording software. Set recording levels to peak around -12dB to -6dB, providing headroom for natural speaking dynamics without distortion.
First recording test: Record a 2-3 minute test episode covering your typical speaking range and energy levels. Listen back through your headphones to identify any issues before committing to longer content.
This systematic approach builds confidence while teaching you how each component contributes to your final audio quality.
Recording Like a Pro on Budget Gear
Technique often matters more than equipment when creating engaging podcast content. Professional podcasters understand that consistent recording practices produce better results than expensive gear used inconsistently.
Microphone distance and positioning: Maintain 6-8 inches from your microphone with consistent positioning throughout your recording session. Speaking directly into the microphone’s pickup pattern captures your voice clearly while rejecting room noise and reflections.
Room selection strategy: Choose the smallest, most acoustically “dead” room available. Closets full of clothes, studios, or offices with heavy curtains often provide better acoustic environments than large, empty rooms with hard surfaces.
Speaking techniques for clarity: Maintain consistent energy levels and speak slightly slower than normal conversation pace. This approach ensures clear articulation while giving listeners time to process your content, especially important for educational or technical topics.
Recording session management: Record in shorter segments (15-20 minutes) rather than attempting lengthy single takes. This strategy reduces fatigue, maintains consistent audio quality, and makes editing more manageable.
Understanding these fundamentals produces immediate improvements in your audio quality, regardless of your equipment investment level.
Upgrading Your Podcast Equipment: What to Buy Next
Smart upgrades follow a logical progression based on actual needs rather than equipment desire. Your initial $200 setup provides the foundation for systematic improvements as your podcast grows and your requirements become clearer.
First upgrade priority – Audio interface: If you started with USB microphones, adding a quality audio interface like the Focusrite Scarlett Solo 3rd Gen enables XLR microphones, multiple input sources, and lower-latency monitoring. This upgrade supports guest interviews and improved audio quality.
Second upgrade consideration – Room treatment: Before purchasing expensive microphones, invest in acoustic treatment for your recording space. Professional-grade foam panels or DIY solutions using heavy blankets produce more noticeable improvements than marginal equipment upgrades.
Third upgrade path – Monitoring and mixing: Better headphones or studio monitors help you make more accurate editing decisions. The Sony MDR7506 or Audio-Technica ATH-M50x provide professional-grade monitoring for critical listening tasks.
Equipment compatibility planning: Ensure new purchases integrate with your existing setup rather than requiring complete system replacement. The Samson Q2U’s dual connectivity exemplifies equipment that grows with your needs without obsoleting previous investments.
This measured approach prevents costly mistakes while building expertise with each component before adding complexity.
Troubleshooting Common Setup Problems
Anticipating and solving common issues quickly prevents the frustration that derails many beginning podcasters. Understanding these typical challenges helps you maintain recording momentum when technical problems arise.
Audio quality issues: Muffled or distant-sounding recordings usually indicate incorrect microphone positioning or gain settings. Move closer to your microphone and verify input levels in your recording software. Background noise often stems from room acoustics rather than equipment problems—address your recording environment before purchasing additional gear.
Connection problems: USB microphones occasionally conflict with computer power management settings. Disable USB selective suspend in your power options to prevent mid-recording disconnections. For XLR setups, verify phantom power settings match your microphone requirements.
Software compatibility challenges: Driver conflicts between audio interfaces and recording software create intermittent problems. Download the latest drivers directly from manufacturer websites rather than relying on generic system drivers. Restart your computer after driver installation to ensure proper loading.
Monitoring and latency issues: Delayed audio feedback (latency) disrupts natural speaking patterns. Enable direct monitoring on audio interfaces or use zero-latency monitoring features in your recording software to hear yourself in real-time.
When technical problems persist, systematic troubleshooting prevents random equipment purchases that don’t address underlying issues.
Your Next Steps
The podcasting industry will reach over 580 million global listeners in 2025, creating unprecedented opportunities for professionals ready to share their expertise. Your unique perspective deserves to be heard, and the technical barriers you’ve constructed are likely more imaginary than real.
This $200 podcast setup budget delivers everything needed for professional-quality recordings: the Samson Q2U microphone provides broadcast-level audio capture, quality headphones ensure accurate monitoring, and a boom arm creates consistent positioning for reliable results. These components work together to eliminate the most common audio problems while maintaining simplicity that encourages regular recording.
Remember Tim Ferriss’s approach: commit to recording at least six episodes, then evaluate your progress. Your expertise has value that transcends equipment specifications—the world needs to hear what you have to say, and most importantly, it should be fun.
The podcasting journey teaches you more about your message than any amount of research ever could. Each episode clarifies your unique voice, refines your content approach, and builds the confidence that comes only through consistent practice. Your $200 investment isn’t buying perfection—it’s purchasing the foundation for discovering your authentic podcasting voice.
What would launching your podcast in the next 30 days mean for your professional goals? The answer to that question matters far more than any equipment comparison chart ever will.
Our Top Podcast Equipment Recommendation for Beginners:
- Microphone: Samson Q2U ($69.99)
- Headphones: Audio-Technica ATH-M20x ($69.00)
- Boom Arm: InnoGear Boom Arm ($26.99)
- Shock Mount: Mic Holder For Samson Q2U ($9.99)
- Pop Filter: Neewer Pop Filter Shield ($9.99)
Total cost: $185.96